ShareX is a free and open-source screenshot and screencast utility for Microsoft Windows. "Screen capture, file sharing and productivity tool "
Screenshots
ShareX can be used to capture full screen or partial screenshots, such as rectangle capture and window capture, as well as being able to record video using FFmpeg. Captured screenshots can be annotated and edited using the built-in ShareX image editor or modified using image effects and watermarks.
Sharing
After capture, a screenshot can be autonomously exported as an image file, email attachment, exported to a printer, to the clipboard, or uploaded to a remote host such as many popular image hosting services or via FTP. If the image is uploaded to a remote host, the URL generated by it can be copied to the clipboard.
Simply take a screenshot and upload it directly to your account on our site? - YES! This is possible with the connection from our side with ShareX. But how? If you want to know how to connect ShareX to media-upload.net, just follow the text below.
a) Download ShareX directly from the official website. (https://getsharex.com/)
b) Download our config file directly by clicking on the link: https://media-upload.net/sharex/mediauploadnet.sxb
Follow the instructions in the ShareX installation program and complete the installation.
Start ShareX (only if it has not started yet)
In ShareX, go to "Application Settings" in the navigation (on the left side of the program)
Now click on "Export / Import" in the "Application Settings"
Now click on "Import" and select our config file (mediauploadnet.sxb)
That's it, now you can easily take screenshots and upload them directly. The standard hotkey is "Roll" (located to the right of F12 / or printing). If you want to connect the ShareX program with your media-upload.net account, please follow the next instructions.
Login in your media-upload.net account
In the panel, click on your email address at the top right of the screen and then on "Profile".
Now copy the "API key" from the table
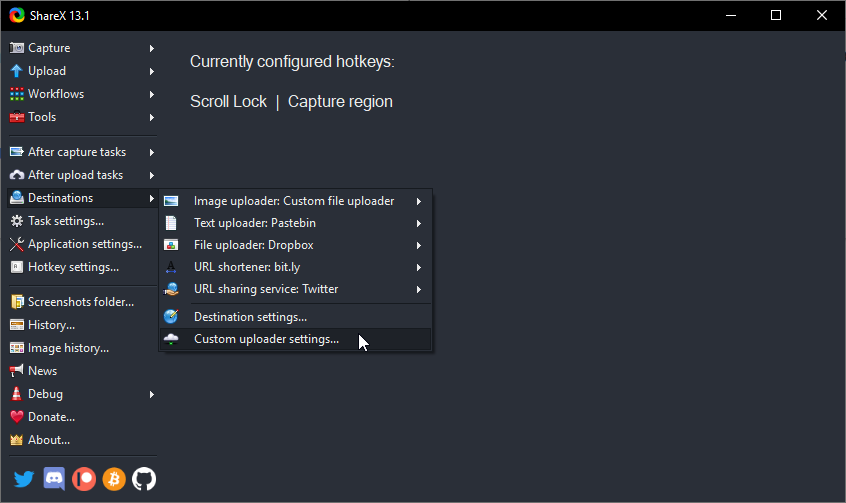
Next open the ShareX program and go to "Destinations" and "Custom uploader settings":

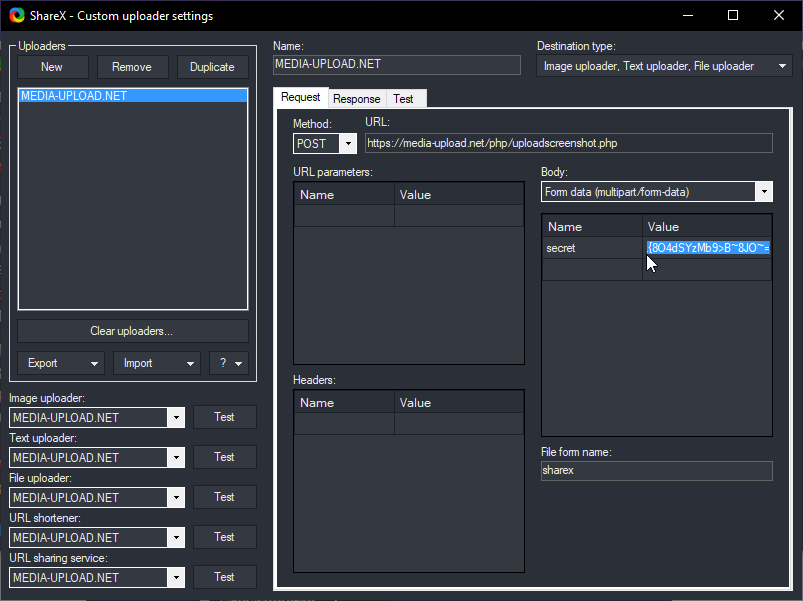
Finally, replace the string in the Value field next to the word "secret" (table on the right) with your initially copied "API key" from media-upload.net:
